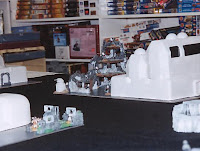
Having recently seen the film "Blackhawk Down" in the cinema, I was seeking to recreate the big fight without using modern figures. Back in those days, there was a sensitivity amongst the HMGS membership about avoiding any games which used recent conflicts which might prove offensive to any veteran who might have lost companions in the same. It's a rule which I still follow.
Setting the scenario of two crashed grav tanks in the Star Wars universe seemed interesting, but switching the sides, so that the baddies of the Empire were seeking to rescue the tank crews (or prevent them from being taken captive by the Rebels) and prevent the tanks from falling into Rebel hands.
For swarms of indigenous troops, I used Ral Partha Pathans, with a small cadre of WEG Rebel Commando minis.
Rules used were StarGrunt II, modified for Star Wars. Vehicles are old GZG 25mm resin, now available again from Demonscape miniatures.
At right - the crashed Grav Tank Firehawk 4-2.
Indigenous rebel-backed fighters are attempting to swarm the crash site while rebel-trained snipers provide fire support.
A closer pic of the crash site. The Imperial crew are in grey and are either dug-in at the base of the tank, or are firing from the deck.
There are two squads of insurgents - one skirmishes in the open while the second attempts to sneak in from the flank.
The second crash site. Firehawk 4 - 3 has crashed in a ruined building. the ruins provided more cover, but made it difficult to extract the crew.
Atop the building at left, a squad of Imperial Storm Commandos has grav-roped on to the roof, while a swarm of indigs attempts to rush the crashed tank.
Firehawk 4 - 3 is able to fire it's main gun from the ruined building, along a narrow traverse, which helps restrict the rebel advance.
Rebel strongpoint with a blaster turret. This emplacement, dubbed the Turret of Doom, was able to keep Firehawk 4 - 2 pinned down throughout the game. The building is painted styrofoam packing.
Another rebel sniper nest of scum and villainy.
Here comes the air-support. An out of focus "Shrike" Attack Speeder strafes some rebels caught in the open.
A shrike is, of course, a little bird. A nasty little bird.
Here's a better picture of the modified GZG AV6 .The addition of fixed wing-mounted blasters and rocket pods had the desired effect...rebel indigs dropped in droves.
These were mounted on wooden dowells so they could "fly" a good three feet above the playing table.
The rebel command post. Alliance officers coordinate the attacks from a safe distance.
I recall the game ended in a tie - Firehawk 4 - 3 was rescued, while the more exposed and harder pressed 4 - 2 was overrun.
Post-Game Thoughts:
 Interesting how sparse the terrain looks to me, now. Were I to replay this scenario, I'd add another three or so buildings, more craters and piles of debris - not to mention some AT-ST walkers in support of the Imperials.
For the Rebels, I have since painted more commandos, though I'd still use my Pathans to represent the local blaster-fodder.
The table is covered in a black felt cloth which was an attempt to simulate macadam - I would now use a dark grey cloth instead.
If I ever get up to GZG-Con on Owego, this would be an amusing game to run...Ω


